
How to Paint an Old Wooden Chair – A simple and fun DIY guide to transform your furniture with easy-to-follow steps for a fresh, new look. Painting old furniture, like a wooden chair, might seem intimidating to some, but for me, it’s an exciting challenge! I love giving an old piece of furniture new life, turning it into something both purposeful and useful.
When our family of five made our biggest move from Asia to Europe in 2018 and settled into a small apartment, there were a lot of things we needed. We were fortunate to be gifted some old chairs by a relative, which helped us save on extra expenses. While the chairs were sturdy, they were well-worn, stained, and quite greasy – so we knew we had some work to do.
First Things First
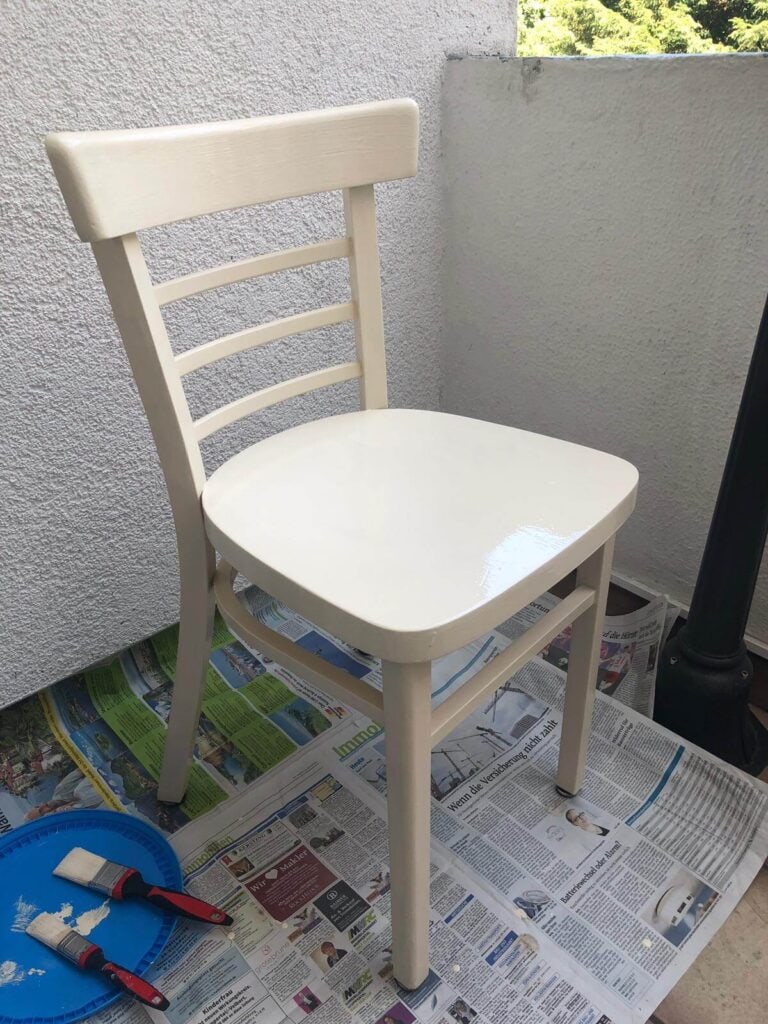
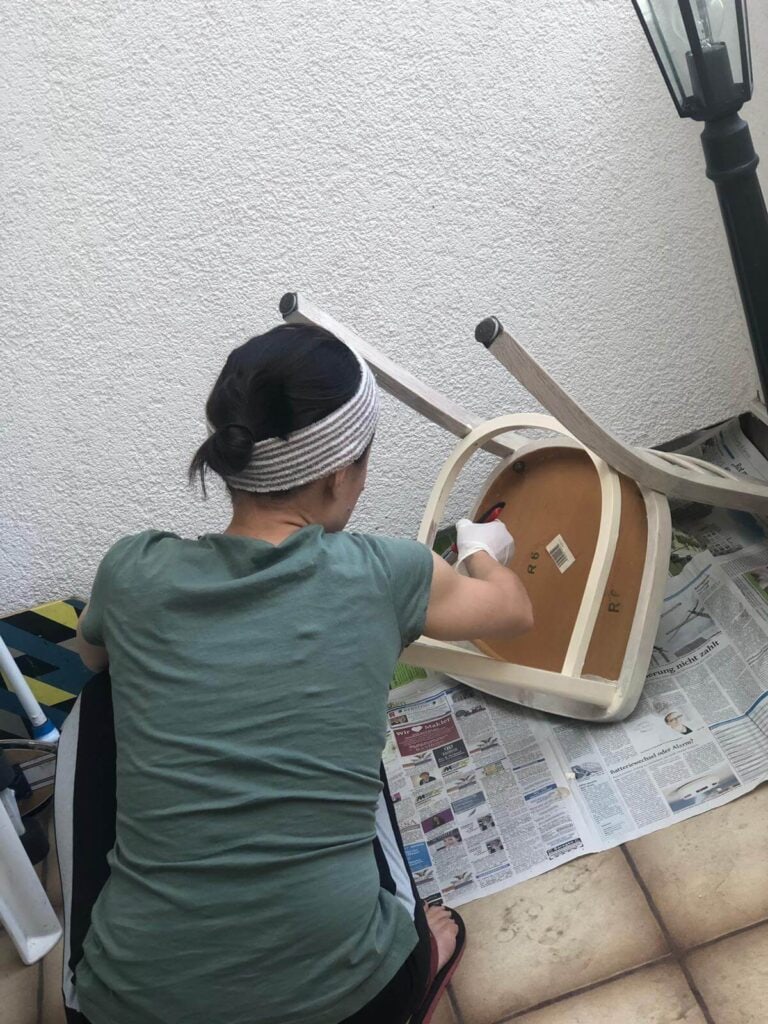
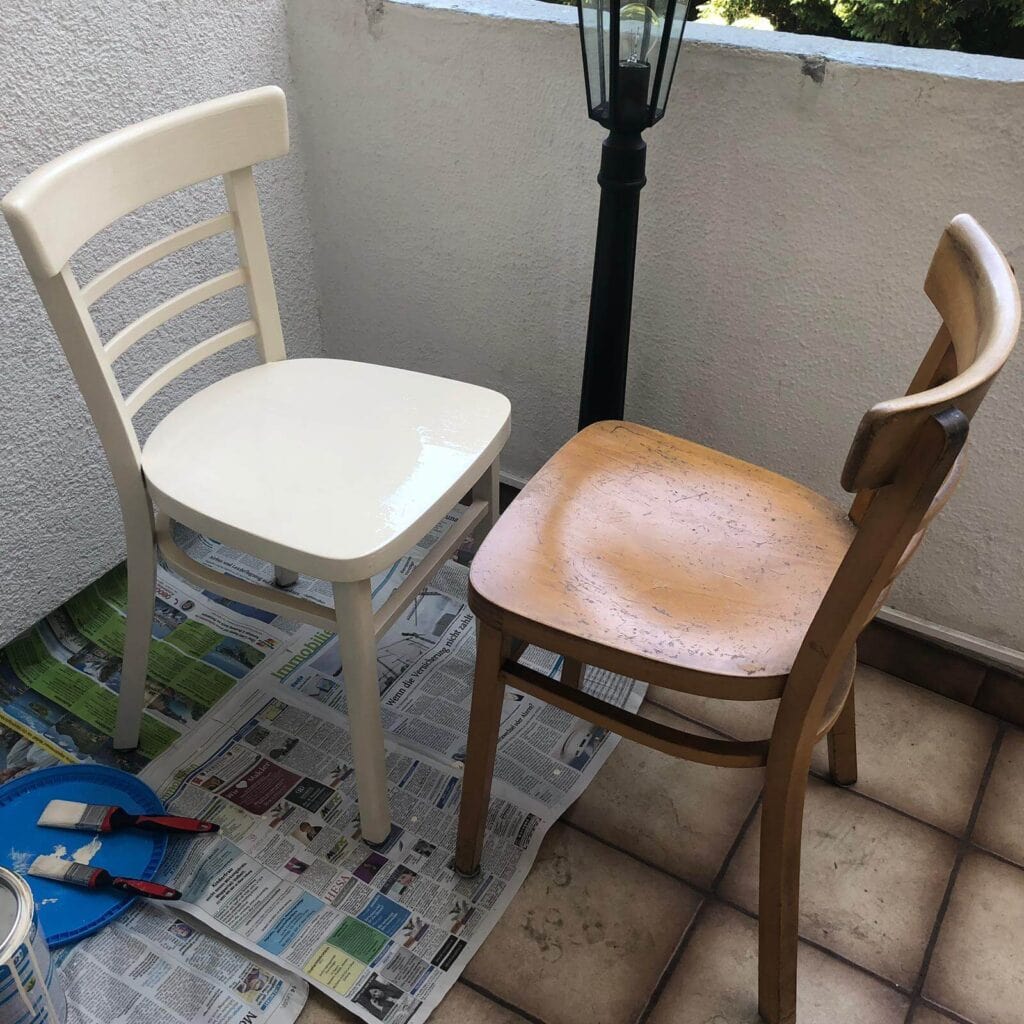
We started by giving the chairs a good scrub with a sponge and some dish soap, and we were so happy with the clean chairs. But after using them for a short while, I began to notice how dull and lifeless they looked. That’s when I knew I needed to give them a little makeover. So, my Mister and I took a trip to the hardware store to grab a few supplies, and I picked out an ivory-colored paint. I was going for something simple, neutral, and timeless—something that would still look fresh and classic years down the line.
How to Paint an Old Wooden Chair: What to Do Before You Start.
Pick the Right Spot:
For this project, it’s best to work outdoors, in a garden or on a balcony, or at least in a well-ventilated area.
Choose Good Quality Paint:
Go for high-quality, low-odor, fast-drying paint and varnish for the best results and an easier experience.
Take Your Time:
To minimise stress and frustrations, make sure you have enough time to enjoy the process—and be patient!
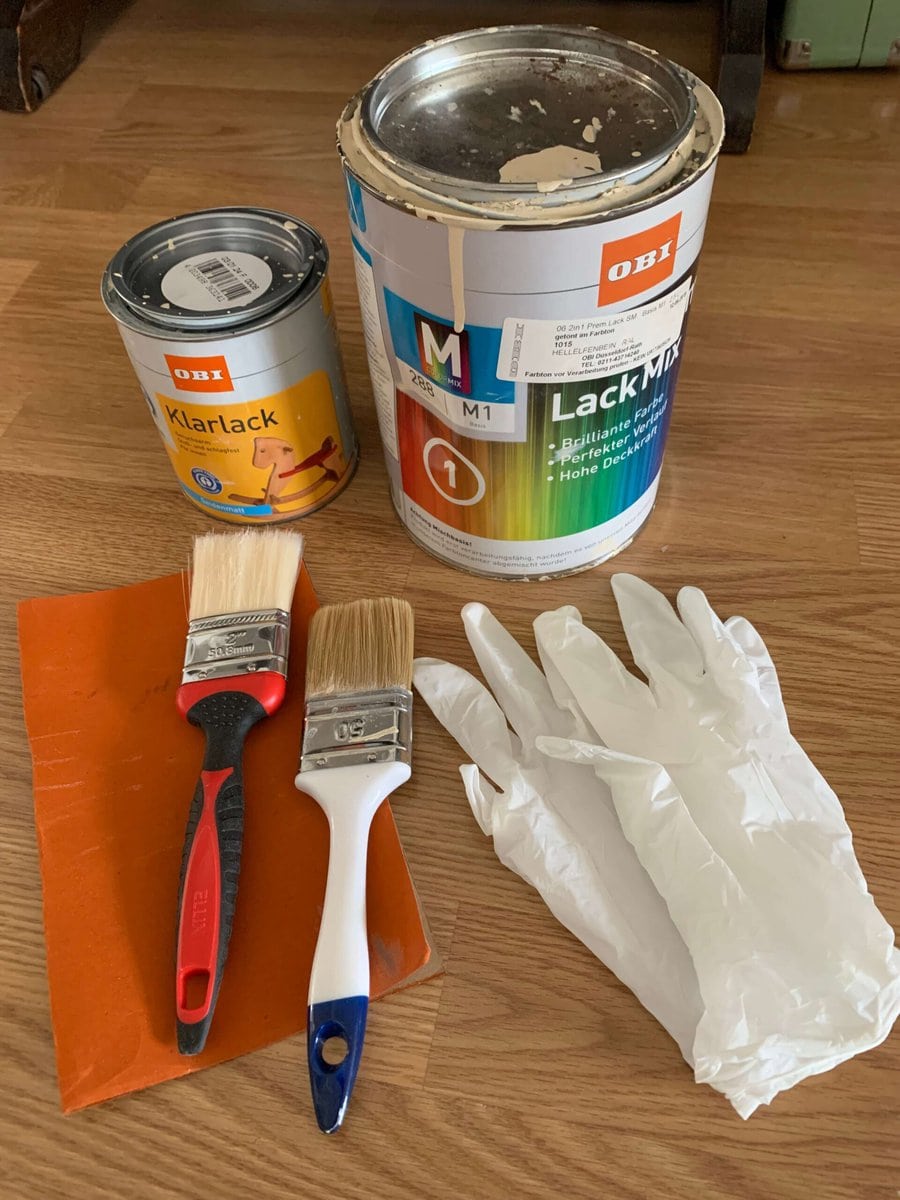
The Materials that Were Used
- Sandpaper
- Klarlack clear varnish
- Lack Mix Light ivory color paint.
- Paintbrushes
- Clean cloth
- Old newspapers
- Disposable gloves (optional)
How to Paint an Old Wooden Chair: A Simple Step-by-Step Guide
- Prep the Chair
- Place the chair on the newspapers to protect your workspace.
- Wipe it clean with a damp cloth to remove dirt and dust.
- Sand the Surface
- Sand the chair to remove rough spots and create a smooth, even surface. Use a damp cloth to wipe the entire surface after sanding, and make sure the chair is completely dry.
- Prime the Chair (Optional)
- Apply a thin coat of primer for better paint adhesion and even coverage, and let it dry entirely.
- Paint the Chair
- Apply your chosen paint with a brush, starting with thin, even coats.
- Allow the paint to dry between coats (follow the instructions on the paint packaging)
- Apply a second coat for full coverage.
- Apply clear varnish
- For extra durability, apply clear varnish to protect the chair from bumps and scratches.
- Let It Dry
- Allow the chair to dry completely before using it.
The Transformation
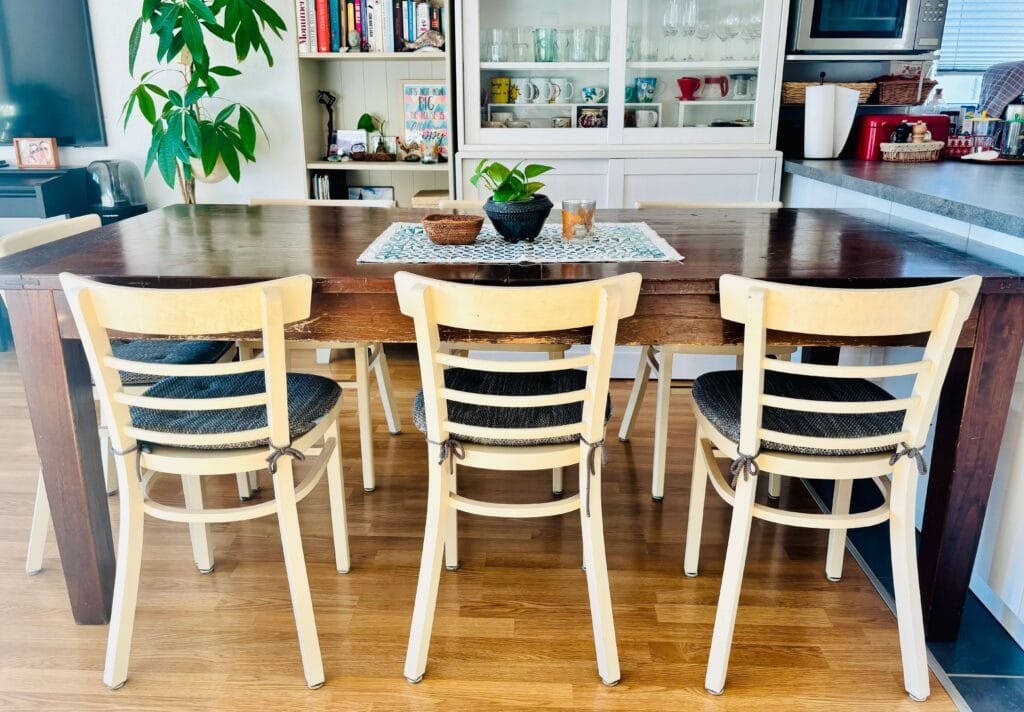
It’s amazing what a simple coat of paint can do—seeing the transformation of those chairs from old and worn to fresh and new was so rewarding! The process was a mix of excitement and a bit of exhaustion. The toughest part was tackling those stubborn stains, but thankfully, my wonderful Mister stepped in to help. With determination, patience, and the gift of time, I managed to finish all eight chairs in just two weeks. I felt so proud of the outcome—it’s truly one of the most satisfying home projects I’ve ever taken on. 😊
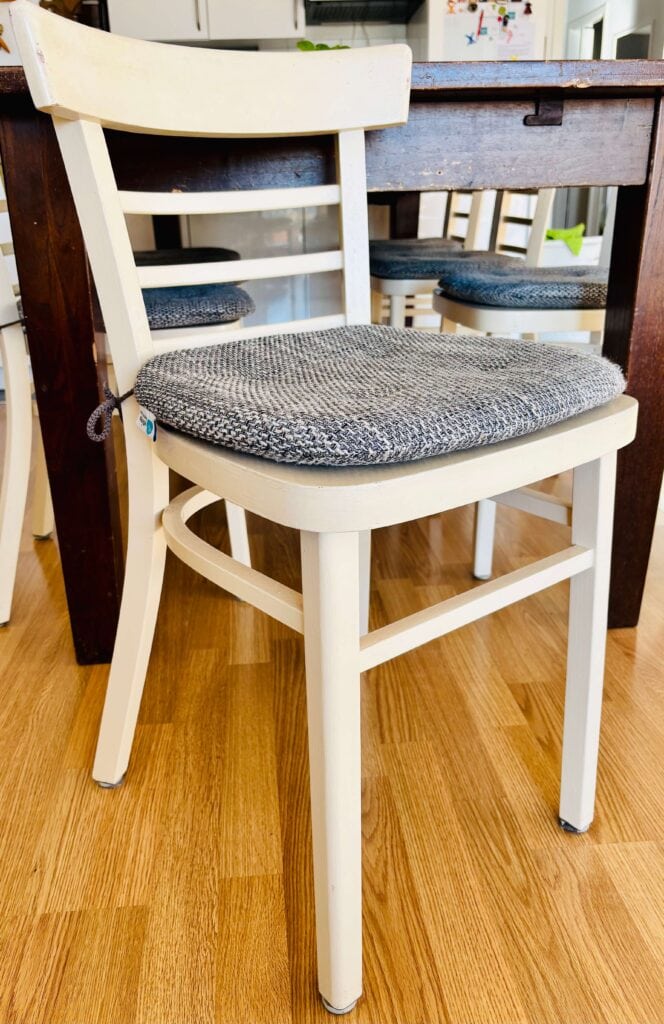
Adding a Touch of Comfort
For extra comfort, I decided to add these seat cushions. They’re great quality, machine washable, and come in four different colors. After over six years of daily use, the chairs have naturally developed a bit of wear, and the paint has faded in some areas. I’m planning to give them a fresh coat of paint soon to bring them back to life!
I hope you find this post inspiring and helpful! If you decide to take on a similar project, I’d love to hear how it goes—feel free to share your experience! Enjoy the process, have fun, and let your creativity shine!
